
Learn how to schedule boarding appointments through both the administrative interface and client portal. This guide covers all steps for successful booking management.
Method 1: Scheduling Through Store/Admin Interface
Initial Booking Steps
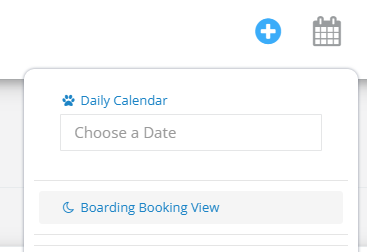
- Click the "Calendar" icon at the top of any page
- Select "Boarding Booking View"
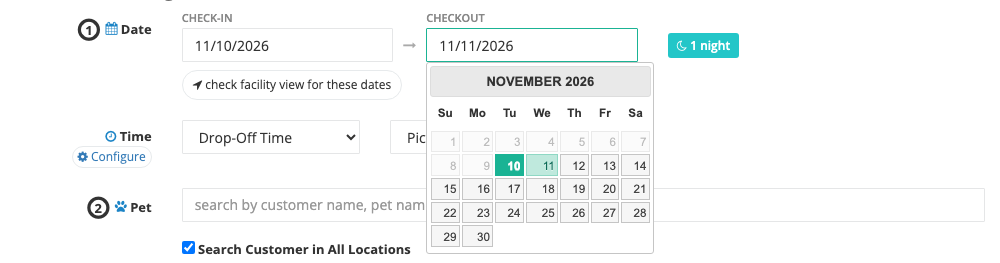
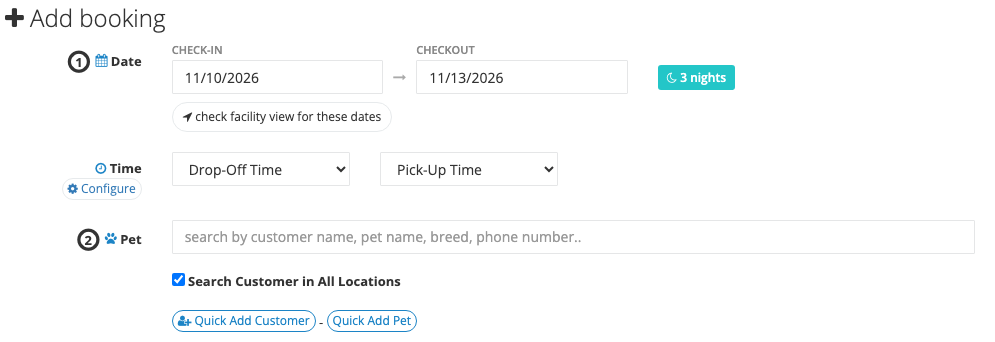
- Set the stay dates. Check-in and Checkout start blank, so the booking only gets the dates you pick:
- Pick the check-in date. Checkout fills in with the next day and its calendar opens.
- Pick the checkout date. Check-in is marked in green, and the nights in between are shaded.
- The number of nights shows next to the dates. Over 14 nights it turns orange, so a long stay is easy to spot before you book.
- Optional: Specify drop-off and pick-up times
- Customize available times in Admin > Date/Time Settings
Finding/Adding Customers
- Search for existing customers using:
- Pet name
- Customer name
- Phone number
- Breed
- For new customers:
- Click "Quick Add"
- Enter required information
Selecting Accommodations
- Choose from available options:
- Select vacant kennel/space from list
- Scroll down for shared accommodation options
Pro Tip: Click "check facility view for these dates" after entering dates to see complete facility availability

Booking Details
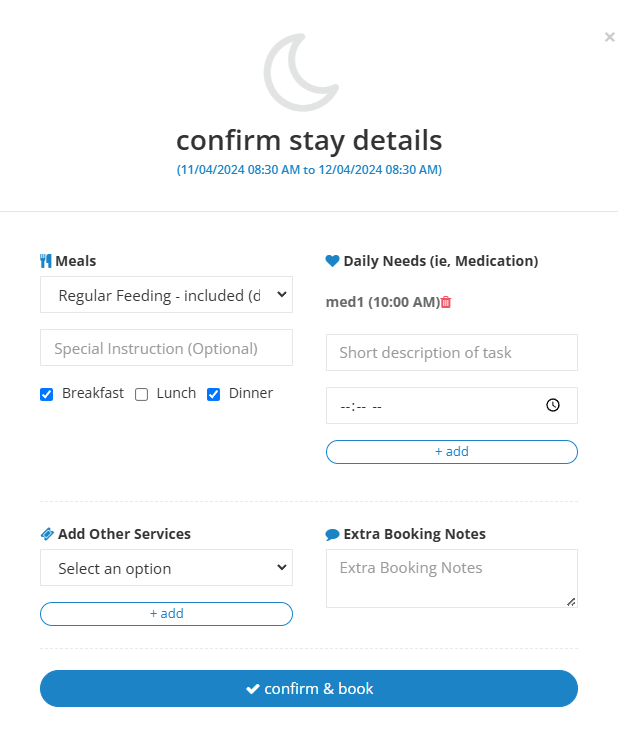
- Review auto-filled preferences from previous stays
- Configure stay details:
- Feeding schedule
- Medications/special schedules
- Add-on services
- Special notes/reminders
- Click "Book" for each pet
Note: All details can be updated later or at check-in
Multiple Pet Bookings
- Book first pet following steps above
- Repeat process for additional family pets
- Select from Shared kennel list if applicable
Payment Processing
- Click "View Invoice" to handle payments
- Review auto-generated invoice
- Payment options:
- Full payment
- Deposit
- Check "This is a deposit invoice"
- View deposit tutorial
- Email options:
- Check "Email Invoice" to send payment link
- System sends receipt for completed payments
Method 2: Client Portal/Widget Bookings
Setting Up Online Booking
- Navigate to left side menu > Online Booking > How to Book
- Access options:
- Copy portal link to share with clients
- Get widget code for website embedding
Client Booking Process
- Clients login/sign up to portal
- Select boarding dates
- Choose available services
- Submit booking request
Managing Online Bookings
- Review incoming booking requests
- Choose to:
- Approve booking
- Decline booking
- After approval:
- Access booking in daily calendar
- Click "Unpaid" link to generate invoice
- Select "Email Invoice" to send payment link
Online Booking Settings
Configure in Online Booking configuration section:
- Cancellation windows
- Booking restrictions
- Available services
- Required fields
Important Notes
- All bookings appear in the daily calendar
- Staff can modify bookings at any time
- Automated invoices reflect current pricing
- Integrated payments enable online payment processing
Related Resources
Need assistance? Contact our support team at support@pawsadmin.com. We're here to help make your booking process as smooth as possible! 🐾